Welcome to Step 3 of integrating your Microsoft Office 365 account with ProSpace.
Here we will create a Room Calendar and Email. The Room Calendar in Microsoft Office 365 will represent your physical room and give the spaces you created in ProSpace a schedule. You will use this Room Calendar to integrate with the Spaces you created at ProSpace in Step 2 / P1 / 6.
To create your Room Calendar, follow these steps:
M3
Log in to Microsoft Office 365 with the “Booking Account” you created in Step 1 / M2.
M4
Create Room Calendar
- Log in to the booking account (booking@yourcompany.onmicrosoft.com) you created in Step 1 / M2.
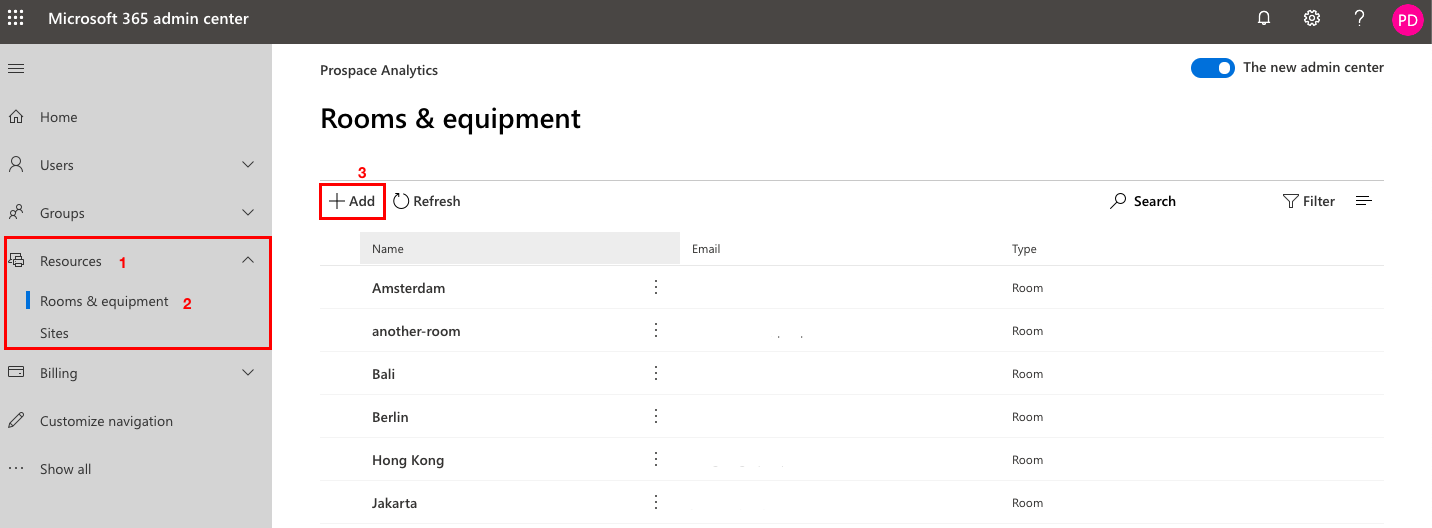
- On your homepage click the menu button on your left top corner and on the left side panel, select “Resources”, and click “Room & Resources”. You will be navigated to a new page, press the “+ Add” button.
- A form will slide in from the right. Set the “Type” to “Room” and fill in all the details. We recommend that you give your room calendar the same name as the physical room at your office and on your ProSpace Account. This will make it easier for you to integrate this calendar with the space in your ProSpace account.

- Click ‘Add’ and your new ‘Room Calendar and Email’ are created. You can now integrate this “Room Calendar and Email” with a space you created in ProSpace Step 2 / P1 / 6.
- To add more Room Calendar, repeat the process
Next: Integrating Your Space in ProSpace with Microsoft 365 Room Calendar